I absolutely adore my Typo Products. From my adorable novelty squishy tortoise pen, to the fantastic mugs and notebooks but my favourite hands-down is my yearly planner. Not because it is beautifully laid out, or because it comes with stickers and cool graphics for every month (even though it has all of that). No the reason I love this planner so much is because of this fun little page at the beginning of the diary where it lists the public holidays. Now there is a page that displays the normal public holidays such as Human Rights Day and Christmas, but the best one is the page that lists all the not-so-official public holidays. There’s an umbrella day, a world kindness day, day of the cookie and day of the ninja and even an emoji day. I know these days don’t give us a day off work but the novelty of them is still quite fun so I try to see if I can ever match up a blog post to one of those fun holidays. Usually I don’t have much luck, but as you may have already guessed from the direction of this intro and the title of the post, I got lucky and today just so happens to be National Apple Pie Day. So, I decided to use that as an excuse to whip up an apple pie for dessert for my family (they will never say no to dessert but apple pie is a popular choice for all of them so they were really happy about this blog post). Right, enough waffling from my side, I’m sure you’re all far more interested in getting this recipe and seeing how my pie turned out so without further ado, here is my step-by-step recipe for a mouth-watering spiced apple pie.

For the pie crust
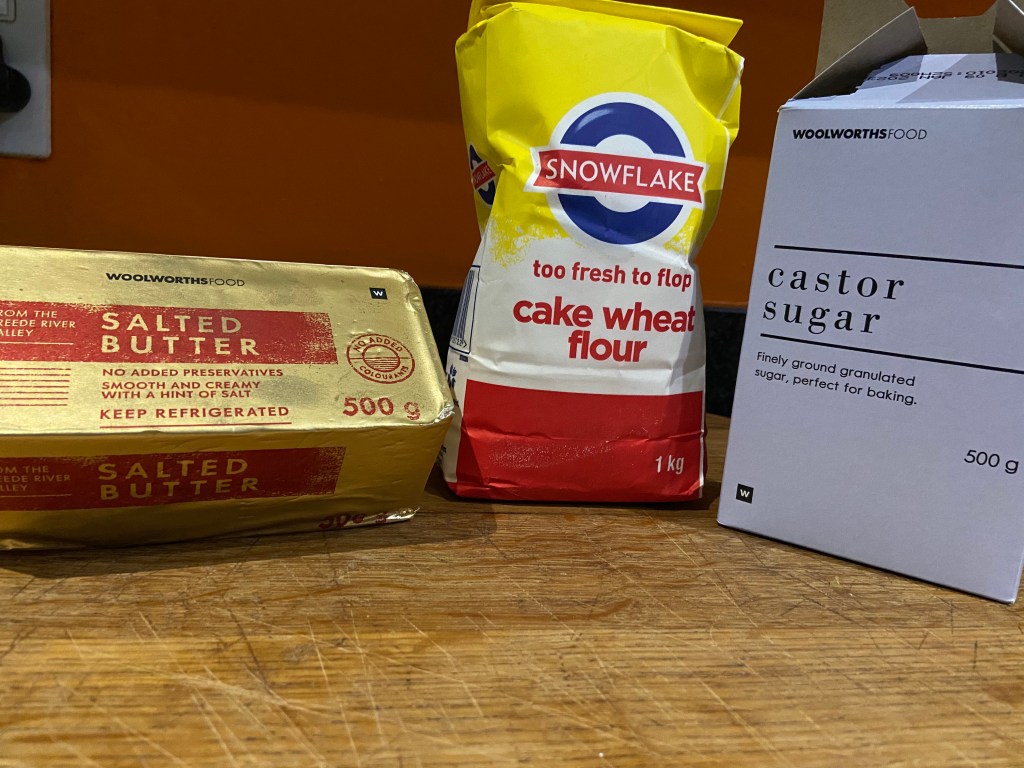
400g cake flour
400g salted butter (softened to room temperature!)
50g castor sugar
For the apple pie filling
6-7 apples (if they are big apples you could get away with five but if you have smaller apples like we have then 7 is a good number)
250g brown sugar
50g butter
The juice of one lemon
2.5tsp cinnamon
1.5 tsp nutmeg
1tsp ginger
½ tsp cloves

Making the pastry
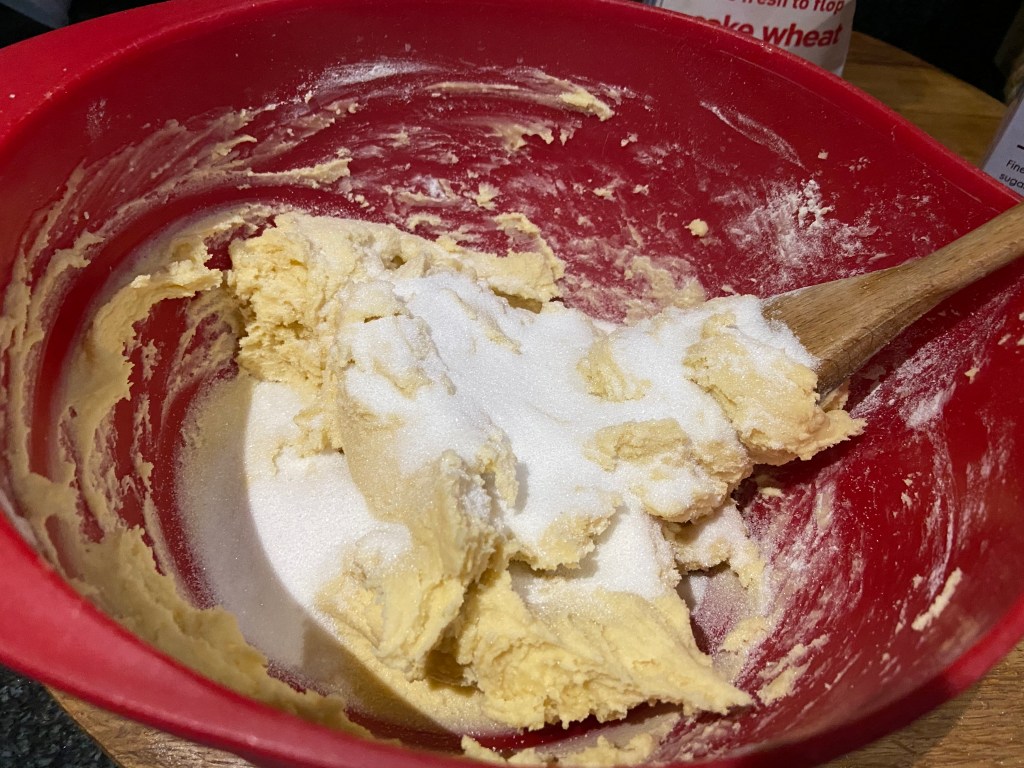
This is probably one of the best and easiest pastry recipes for pies in the world. It’s got so few ingredients, is so easy to make and if you treat it well, it will make a delicious pie crust. Start off by ensuring that your butter is nice and soft. Next, sift in the flour and stir the two together until they come together to form a light-coloured dough. It should be ever so slightly sticky but not so sticky that you can’t get it off your fingers.


Next, measure in the castor sugar and then stir it into the dough. If your dough is still too sticky, add in a little extra flour until it is more workable (be careful not to add too much flour or to overmix your dough!).
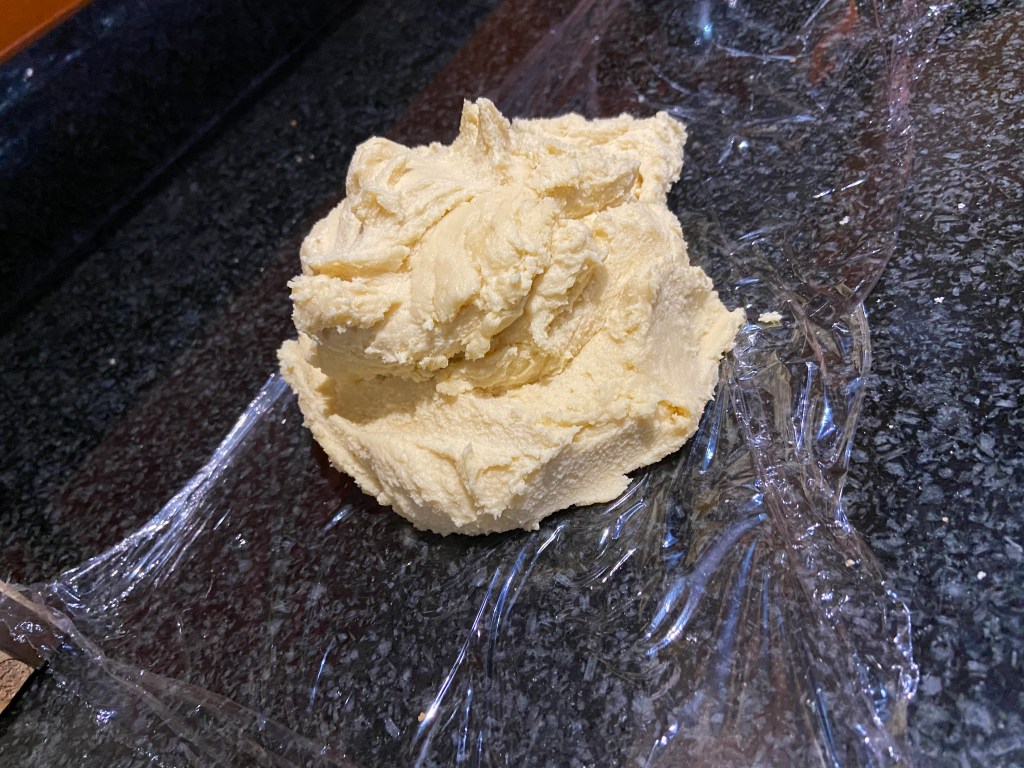
Scoop your dough out of the bowl and place it in some clingfilm. Wrap the clingfilm around your dough so that there are no gaps for air to get through. Place your wrapped pastry in the fridge and leave it for about an hour, if you plan on using it that same day. You can leave this pastry overnight, or for even a few days in the fridge but then you’ll need to take it out the fridge to soften to a workable temperature before you can use it.

Making the filling
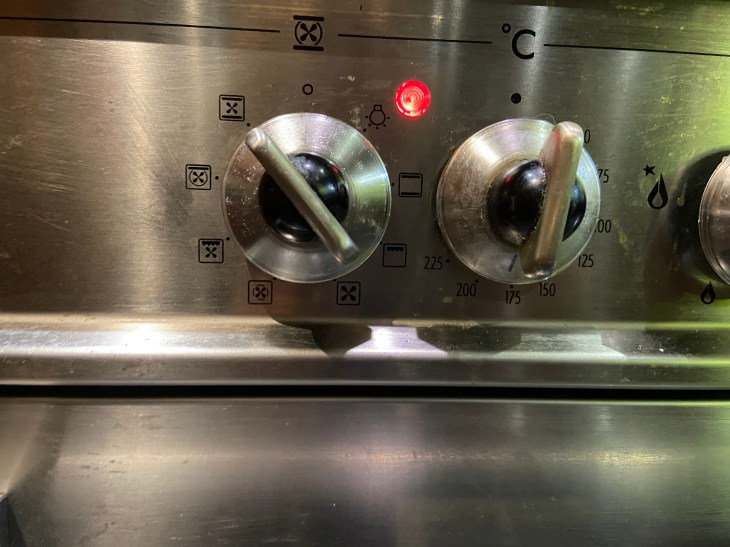
First things first, turn your oven on and set it to 180 degrees Celsius. You’re going to need this later for the pastry and then the pie so it helps to have it ready for when you need it.
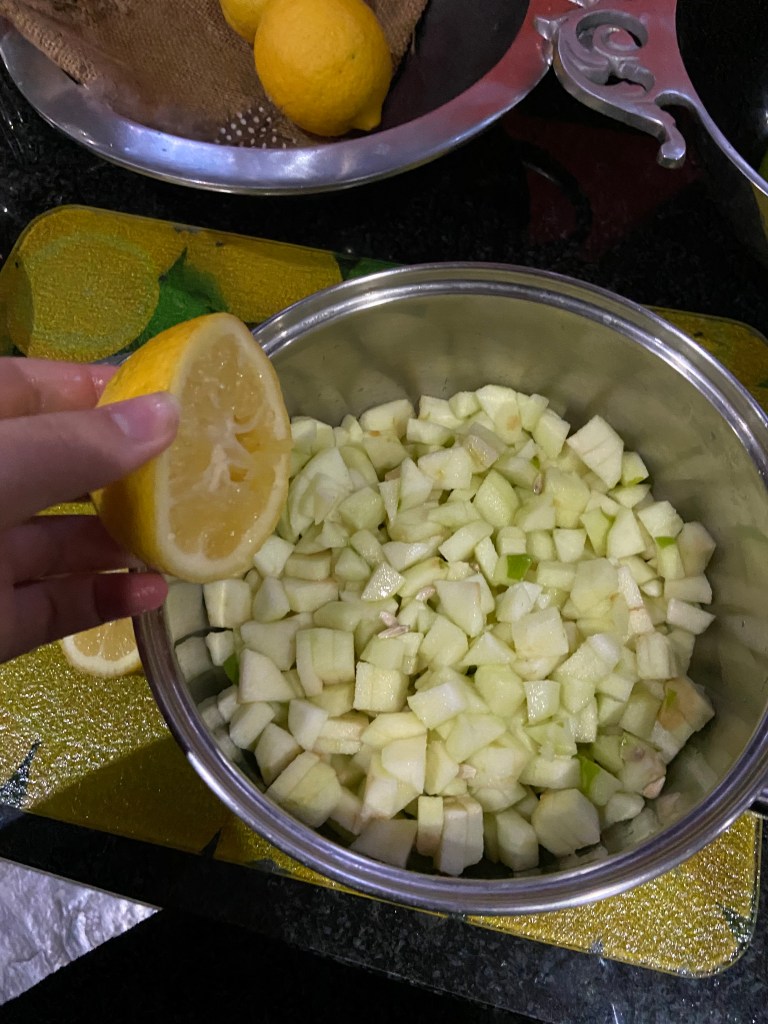
Start off by coring, peeling and dicing all of your apples. The size of your apple slices doesn’t really matter – it depends on what type of filling you want in your pie. I like to dice them up small but not too small so that the pieces aren’t too unwieldy yet nice and chunky enough so you know you’re eating an apple pie and not an apple sauce pie.

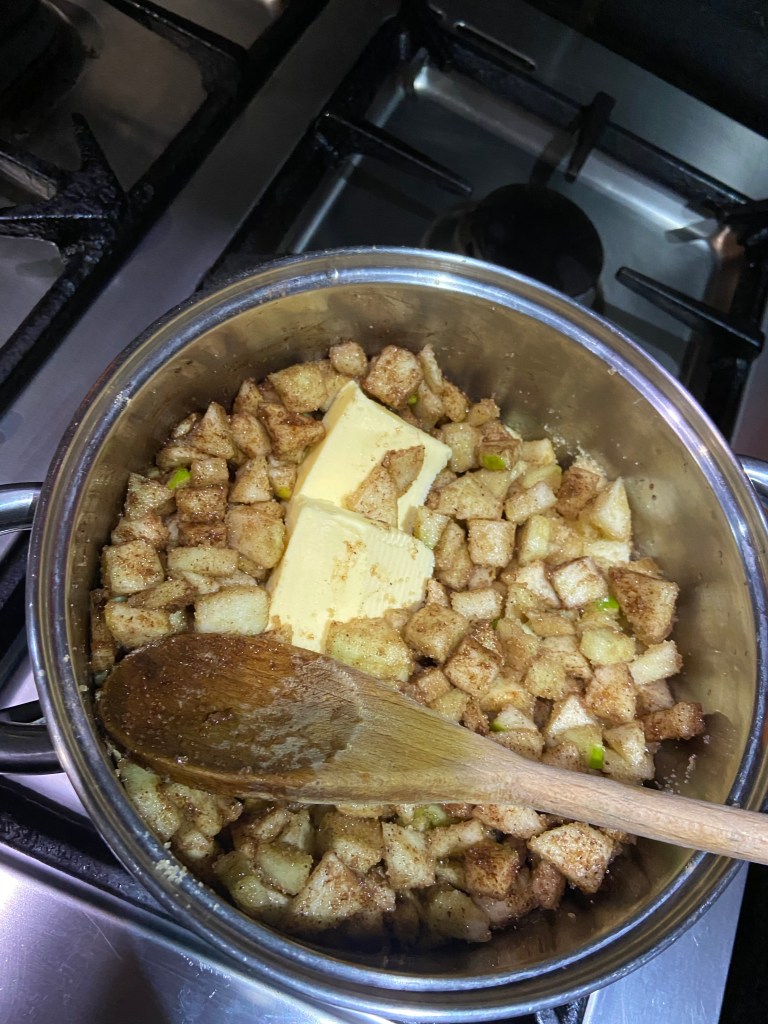
Place all your apples into a decent sized pot/saucepan and squeeze the lemon juice over it. This adds a nice tart, acidity to the filling but also stops the apples from going that awful brown colour. Add the sugar, butter and spices and start cooking the mixture on a low-medium heat on the stove.

Stir until the butter and sugar has melted and all the apples are evenly coated in all the other ingredients, then turn the temperature right down, place the lid on top (skew so as to let the steam out of your cooking apple mix) and leave it until the sauce is nice and syrupy and the apples are soft. Set aside to cool.

Making the pie
Once your pastry has chilled in the fridge, take it out. It’s now time to assemble your pie. Roll the pastry out over a floured surface, then transfer the rolled-out dough into your pie dish. If it cracks or falls apart, that is completely okay. You can either roll it again or put the broken pieces into the pie dish and smooth the cracks together with your finger (I promise no one will notice the difference when it’s time to eat). Make sure your whole dish is covered in an even amount of pastry. There should be some dough left over, but don’t throw this away! You’ll need it for later. 😊

When that’s done, you need to blind-bake your pastry. Place some baking paper on top of your pastry. Then, whether you’re using stones, beans or baking beads (whatever you have that is safe to put in the oven and be cooked without tampering with your dish), evenly distribute them inside the pie dish on top of the baking paper. This blind-baking will get your pie base nice and crusty so that the filling doesn’t make the base soggy, and the stones help to ensure that your pastry doesn’t rise or get bubbles while it’s cooking. Bake your base in the oven for about 30-45 minutes (it depends on the oven, the size of your pie etc. but you’ll know it’s done when the edges are a nice golden brown and you can lift the baking paper from the bottom without pastry sticking to it.

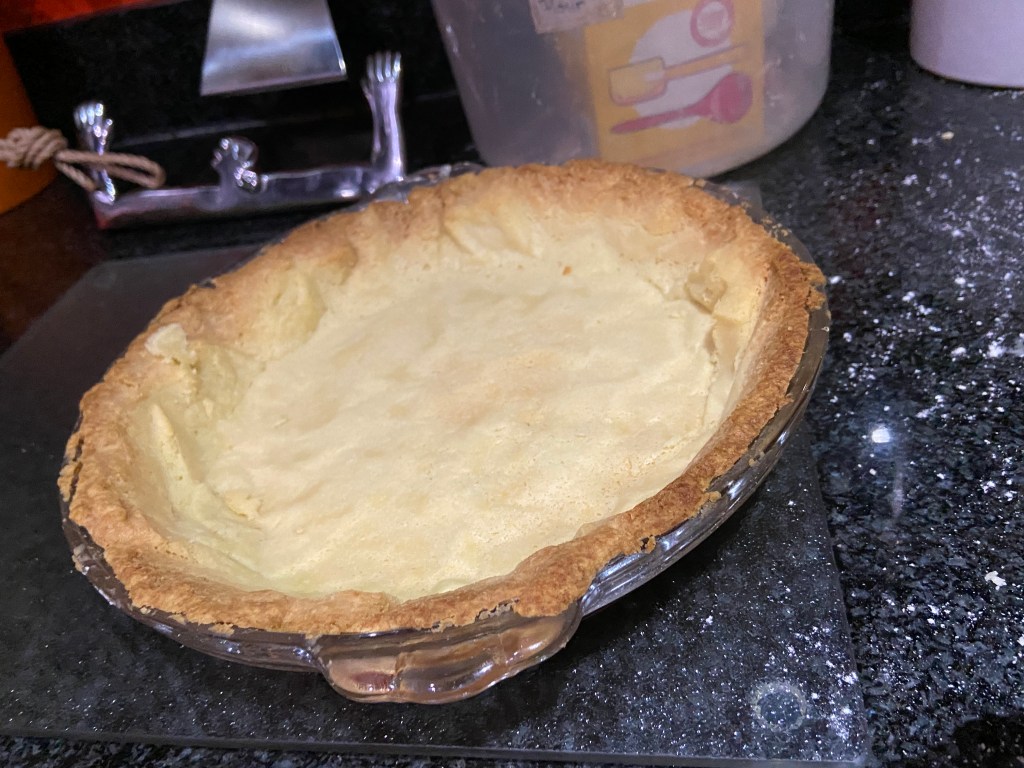
After you have blind-baked the base, set it aside and take the stones out and remove the baking paper. Be careful when you do this because those stones will be piping hot. Leave the base to cool a little, and once the base feels dry and hard to the touch and it isn’t scorching hot, you can put in your filling. Spoon the filling into the pie dish. I say spoon it because that way, you don’t end up pouring too much of the liquid in, and that can make the base soggy. Spread the apples so that they are evenly distributed in the dish, and if you want you can spoon a bit of the leftover syrup on top.

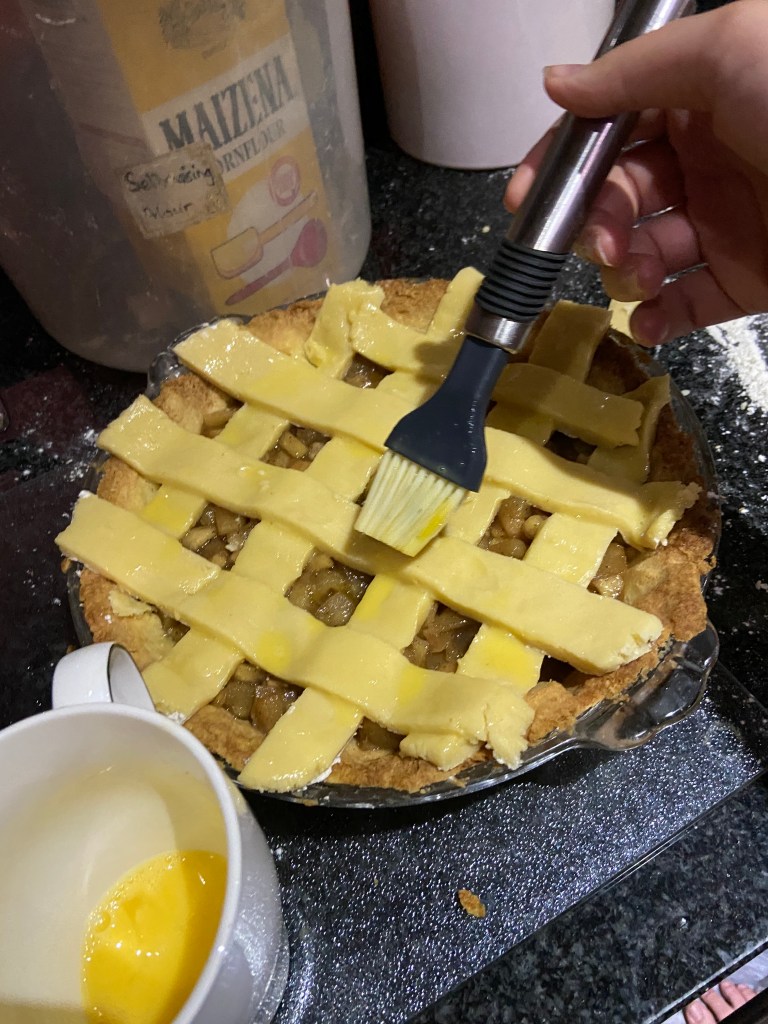
Last but not least, we get to the ‘decorative’ part. Remember that leftover pastry I said you shouldn’t throw away? Well now is when we use it. Roll it out again on a floured surface and cut it into slices. Very carefully, you can place the slices across the top of the pie to give it a nice criss-cross woven look. You could actually do anything you want over the top, but this is the one we like to use (just make sure you do it evenly so that the pastry all cooks through in the same time).

Whisk one egg in a cup and using a pastry brush, very gently brush the egg wash over the top layer of pastry. The pastry will be fragile and sensitive to the moisture so try to be as careful as possible. Before you put your pie in the oven, the last thing to do is dust a little cinnamon over the top. Now bake your pie for about 30 minutes (again this is variable but you’ll know when the pastry on top turns that beautiful golden colour).
You could eat your pie straight away, but it will be far more enjoyable if you leave it to sit and cool a little (about thirty minutes from the time you took it out of the oven). That way, it isn’t too hot so you burn your mouth, but still nice and warm. The best way to serve this dessert is with a scoop of vanilla ice cream or a blob of whipped cream, but it is just as delicious if you eat it by itself.

Apple pie has always been a favourite in our house so it’s safe to say we’ve made quite a few of them. I really hope you enjoyed this step-by-step recipe, courtesy of National Apple Pie Day, and if you decide to try it out yourself, please let me know how it turns out. Baking seems to have become a very popular hobby during this coronavirus induced lockdown/quarantine, so if you do try out this recipe, I hope that you find it as delicious as me and my whole family does. Also, if you would like me to do more recipes/crafts or other types of blog posts, please let me know in the comments section. As always, thank you all so much for reading! I’m now going to cut myself a slice of apple pie, if my brothers have left me any …
Lots of Love
Blondey on a Mission xxx
