
Heyyy everyone!
Welcome to another Blogmas post, and today I thought I would share a super fun (and easy) Christmas craft tutorial. This was inspired by a session that I hosted in my Disney society. During the term we held a craft and cake session at one of my favourite cafes in Durham (it’s called Hatters, and you can read about it in my post I wrote about my top 5 places to eat in Durham) and made Disney-themed crafts. One of which was a snowman and the best part about it is it uses mostly recycled material(s) and rice that we got from the zero-waste store I volunteer at, Scoop. So today I’m going to share the tutorial for this craft because not only is it super fun to make, but it’s also just an adorable Christmas craft using some pretty basic (and reusable) materialy. I hope you enjoy it!
What you’ll need for your snowman
A (preferably white) old sock you don’t plan to use again
A colourful sock you have no problem cutting up
At least 300g of rice
Twine or string
Black and orange paint
Any buttons you have lying around without a home
Some craft glue/super glue
Right… now… do you wanna build a snowman??
- First things first, lay your white sock on the table and cut it just above where the heel is. This will be your snowman body.
- Next, fill up your sock until it’s almost full, leaving just enough space so you can tie the top without it bursting like an overstuffed burrito.
- Tie the top of your sock so that the rice doesn’t come spilling out the top. Then, tie another piece of twin around the middle, dividing your stuffed sock into a bigger body, and a smaller head. Voila – the base of your snowman is ready!
- Now comes the fun part – giving your snowman some personality. Use your colourful sock and cut the toe of the sock off like so. This will be your snowman’s hat. Fold it over a little and place it over your snowman’s head.
- Next, cut off the top stretchy band of your sock, and then cut it so that it’s one long piece not a really weird scrunchie. This is your snowman’s scarf, so you can tie it around his neck.
- Depending on how many buttons you have, you can just glue two on the body for normal snowman buttons, but if you have some small ones you can always use them as eyes.
- Last but not least, use your paint to give your snowman a cute little face
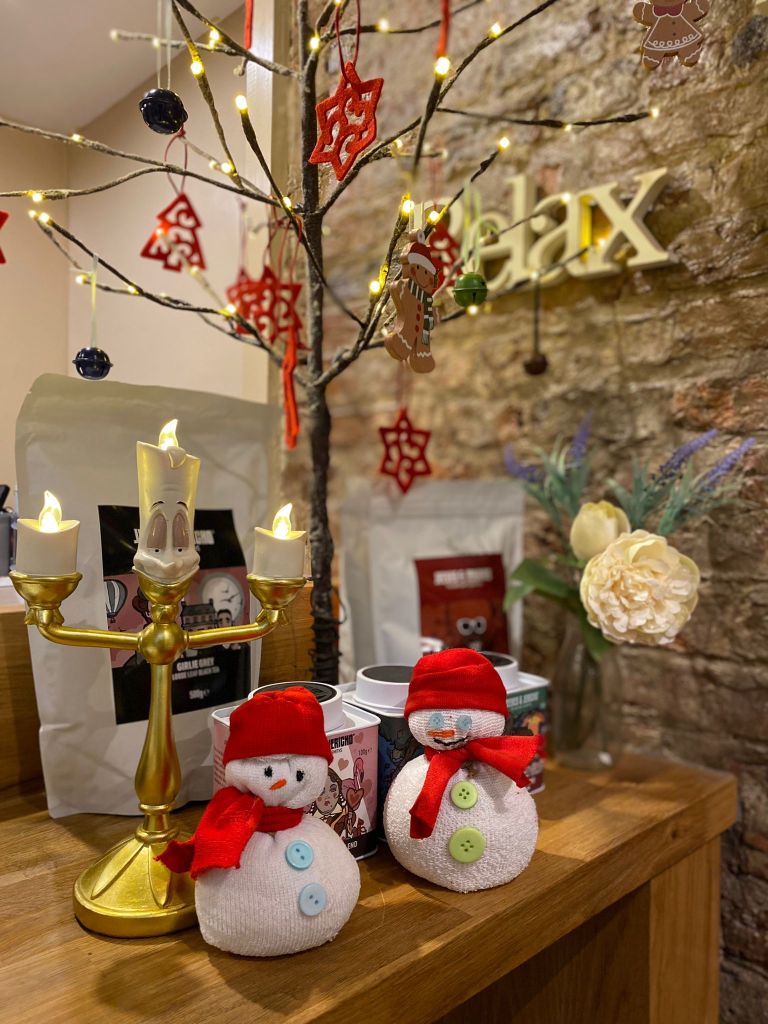
Your snowman is now complete and ready to model on your mantle this holiday season. I hope that for whatever reason you decided to make this little snowman (if you decide to make one), that you had fun making him. Whether it was with your kids, as a fun craft with your friends, for a stocking stuffer or just because you love crafts, I hope you enjoyed making your own little Olaf sock friend.
Thanks so much for reading today’s blogmas post everyone! I’ll see you all tomorrow
Lots of Love
Blondey on a Mission xxx

Wow these are so cute!
LikeLiked by 1 person
Aww thank you!
LikeLiked by 1 person
Those are SO cute! Thanks for sharing!
LikeLiked by 1 person
Aww thank you – I love them and they are so easy to make!
LikeLike
Reblogged this on Witch Craft and Writing and commented:
I love her stuff. She inspired me to participate in “blogmas but make it psychic of my own.”
LikeLiked by 1 person
How clever and cute, thank you Blondey
LikeLiked by 1 person
Thanks for reading Wendy! They’re a great project for using socks with no partners
LikeLike
Sock snowmen, aww that’s so cute!!!
LikeLiked by 1 person
Aren’t they just??
LikeLiked by 1 person
Absolutely!!! I love the Lumiere in the background too, by the way. Where did you get him?
LikeLiked by 1 person
Sadly he’s not mine he belonged to the cafe where we made our sock snowmen
LikeLiked by 1 person
Oh shoot, he’s not yours? Darn it! That would make a great decoration for your apartment!
LikeLiked by 2 people
I knowww very sad – haha if it wasn’t so expensive I’d live in a Disney/Christmas hybrid village 😂
LikeLiked by 1 person
Oh that would be nice, haha! Disney really knows how to get into the Christmas spirit.
LikeLiked by 1 person
Haha that is so true!!
LikeLiked by 1 person
This is soo cute!!!!
LikeLiked by 1 person
Awww thank you and they are both super easy and fun to make!!
LikeLike
Yeah, I’m definitely going to try it!
LikeLike