Helloooo my lovely readers! How are you all doing?
I don’t know about you but nothing quite puts a smile on my face like digging into a luscious, sweet, homemade dessert. I mean, you get the first awesome part that you made it yourself, and the second part is obviously getting to devour it. I’ve been on a bit of a baking kick at the moment, partially because I’m on holiday and I have time to spend in the kitchen, and partially because I’m a bit sad and eating lots of dessert (albeit an unhealthy strategy) is making me feel a bit better.
Before anyone asks, my sadness is because unfortunately an amazing summer job opportunity I had lined up has been cancelled due to covid, so I’m rather bleak about that and as such, am trying to make myself feel better by drowning my sorrows in complex carbs and sugar. Good plan right?
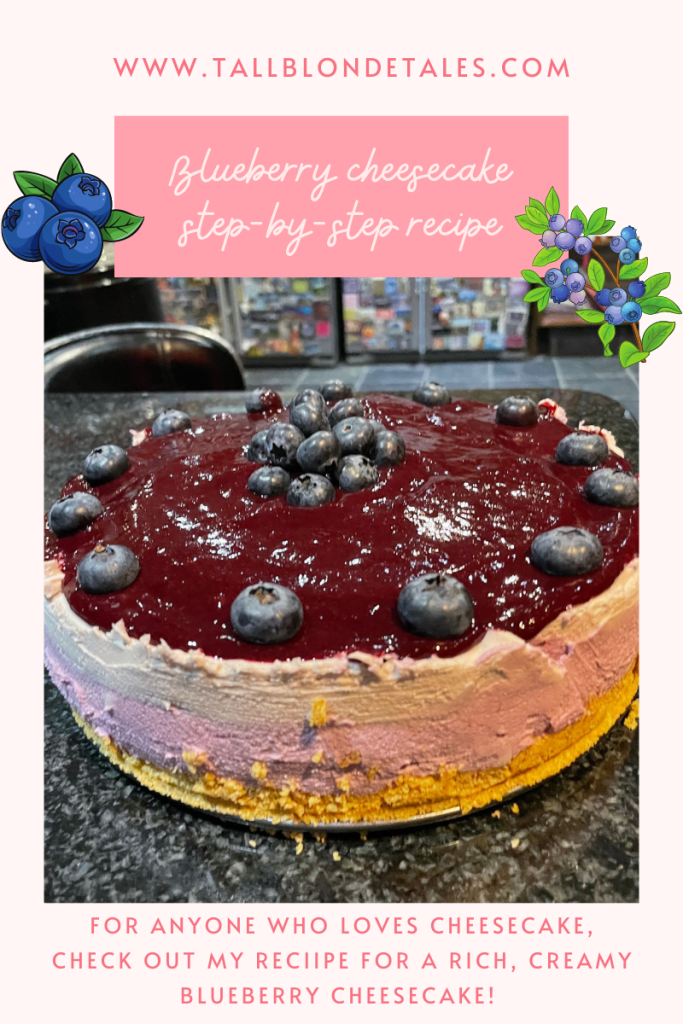
So anyway, this week I had a craving for cheesecake, after the strawberry cheesecake I made turned out so well. I also figured it would be a great chance to knock something off my summer bucket list – make something with strawberries/blueberries. So, without further ado, I present to you … BLUEBERRY CHEESECAKE!!
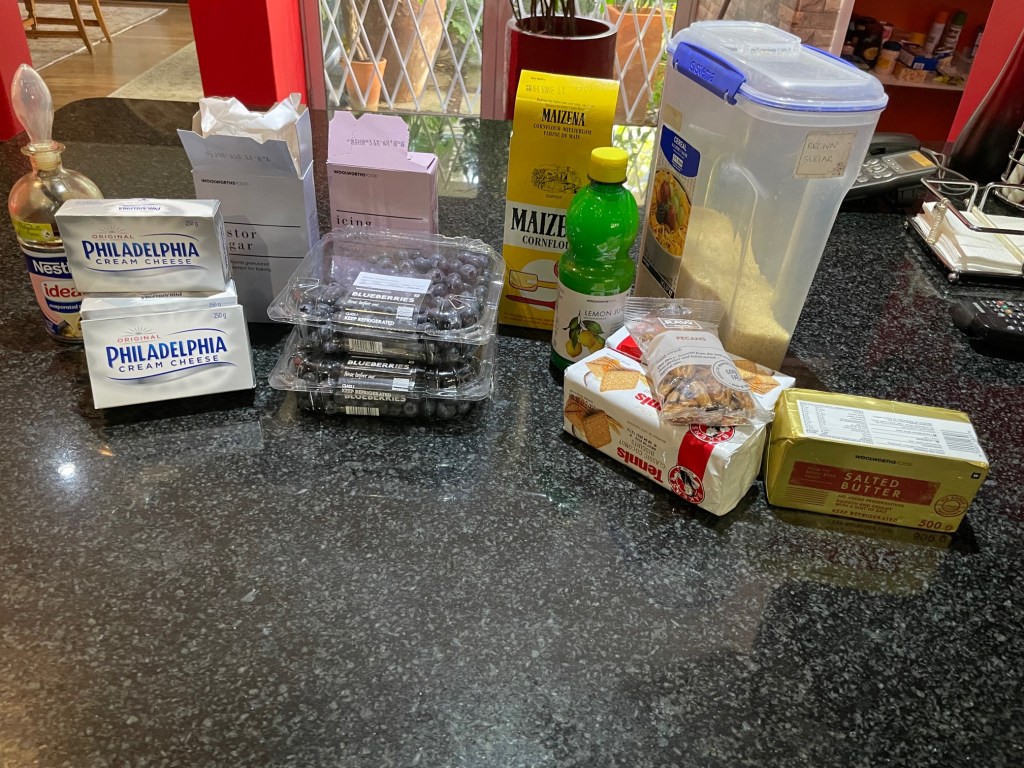
INGREDIENTS
For the crust:
- Two sleeves of tennis biscuits
- 75g toasted pecan nuts
- 130g melted salted butter
- 100g light brown sugar
For the reduction:
- 500g blueberries
- 50g castor sugar
- 60ml lemon juice (¼ cup)
- 1 ½ tbsp cornstarch (mix with cold water before adding)
For the filling:
- 4 packages (250g each) of Philadelphia cream cheese at room temperature
- 60ml sweetened condensed milk (¼ cup)
- 1 tbsp lemon juice
- 1 tbsp vanilla extract
- 65g castor sugar
- 25g icing sugar
METHOD
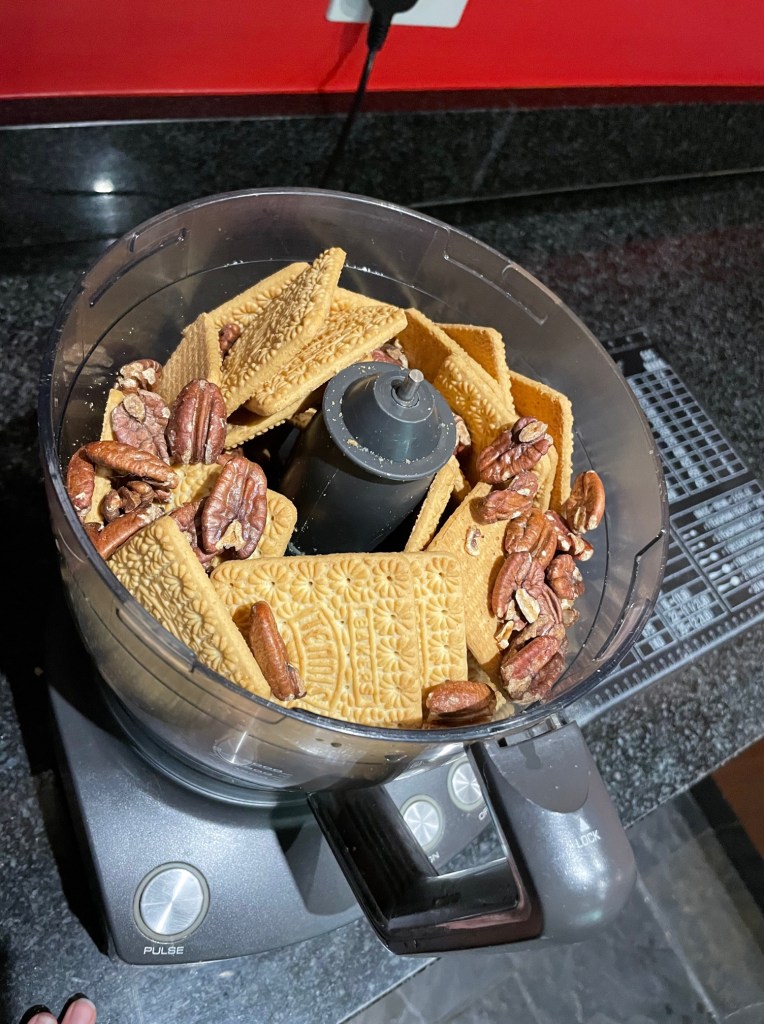
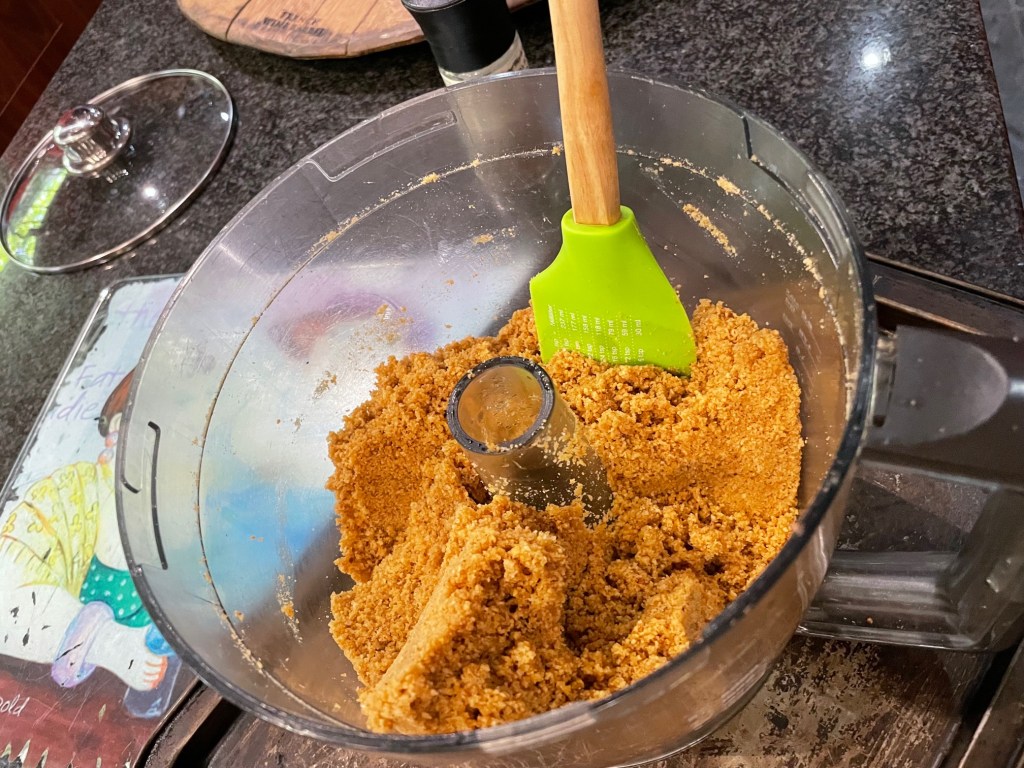
- First let’s start by making the crust. Put the tennis biscuits and toasted nuts (optional – the recipe still tastes delicious without the nuts if you’d prefer not to add them) in a food processor and pulse until they make a fine crumb.
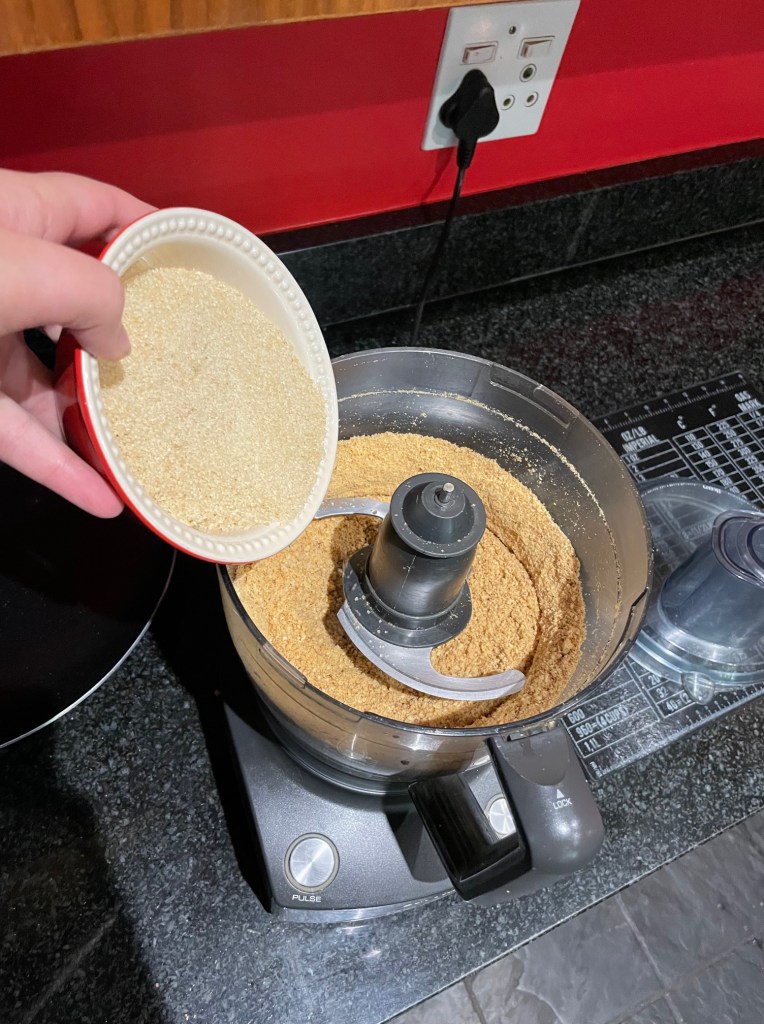
- Add the sugar and pulse again until it’s mixed well
- Pour the melted butter into the crumbs and use a spatula to mix it together
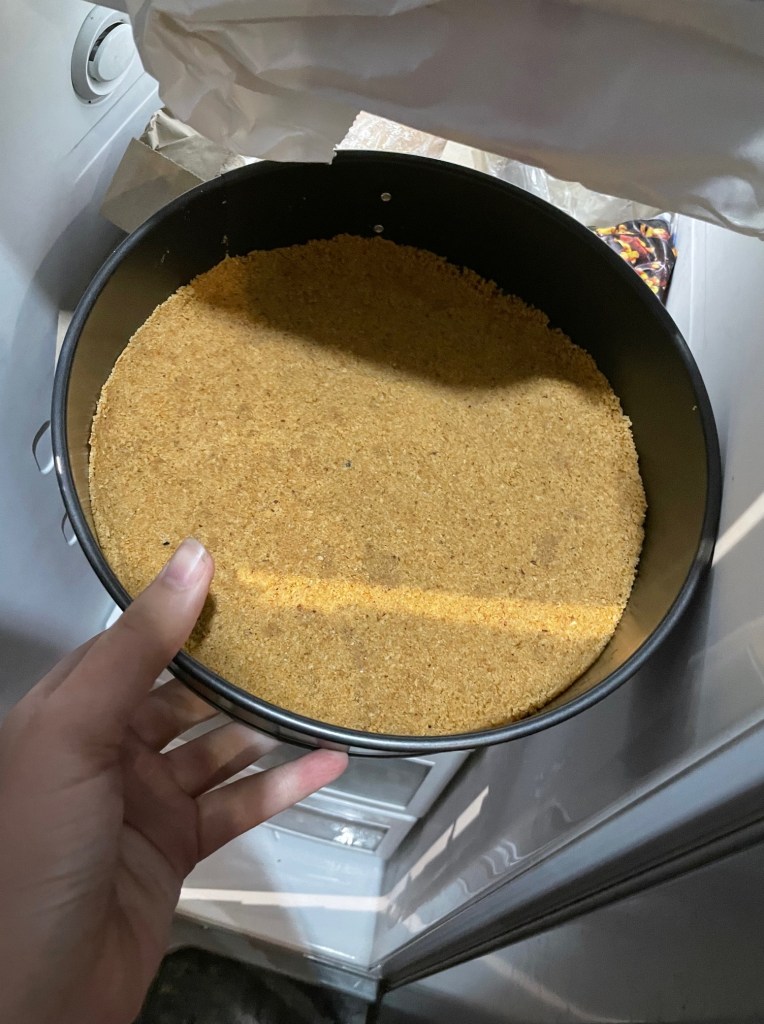
- Transfer the mixture into a spring-form pan or pie dish so it is evenly distributed. I personally like to just make a crust for the bottom of the dish, but this recipe does allow for a crust that goes all the way up the sides too (and sometimes a few small ramekins depending on the size of your pan/dish)
- Press the crumbs into a flat layer using a glass to compact it as much as possible, and then place it in the freezer to chill until the filling is ready.

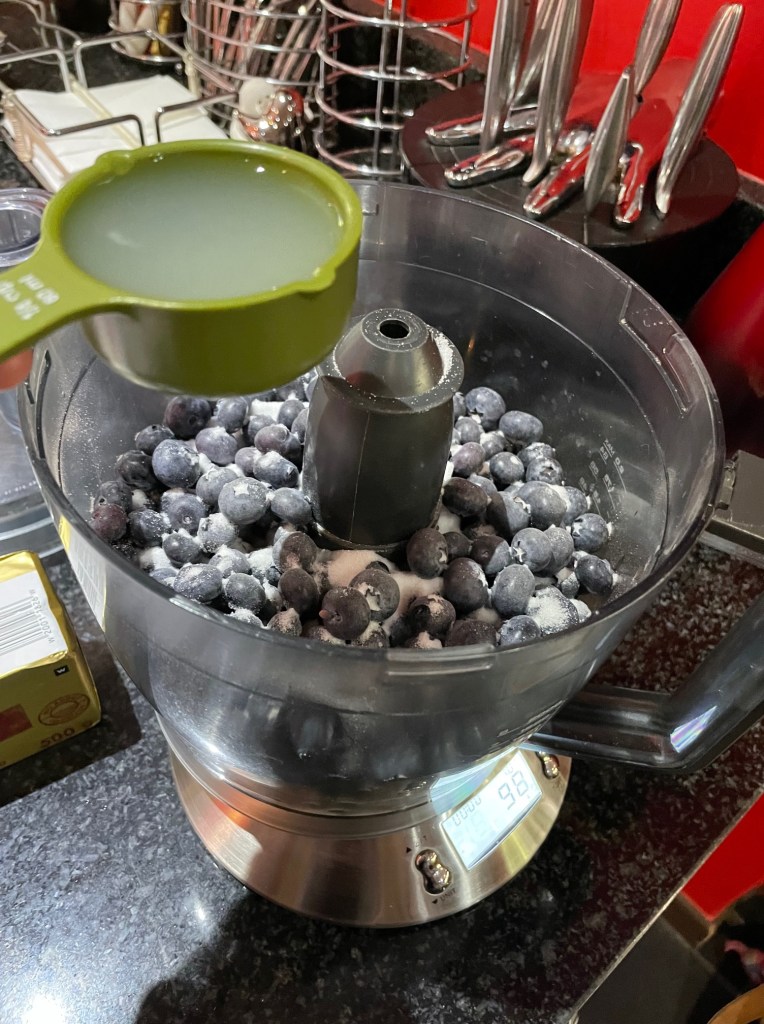
- Now it’s time for the blueberry reduction: put the blueberries, sugar, lemon juice and cornstarch (remember to mix it with cold water first before adding it to the blueberries) into a blender or food processor and pulse until liquefied.
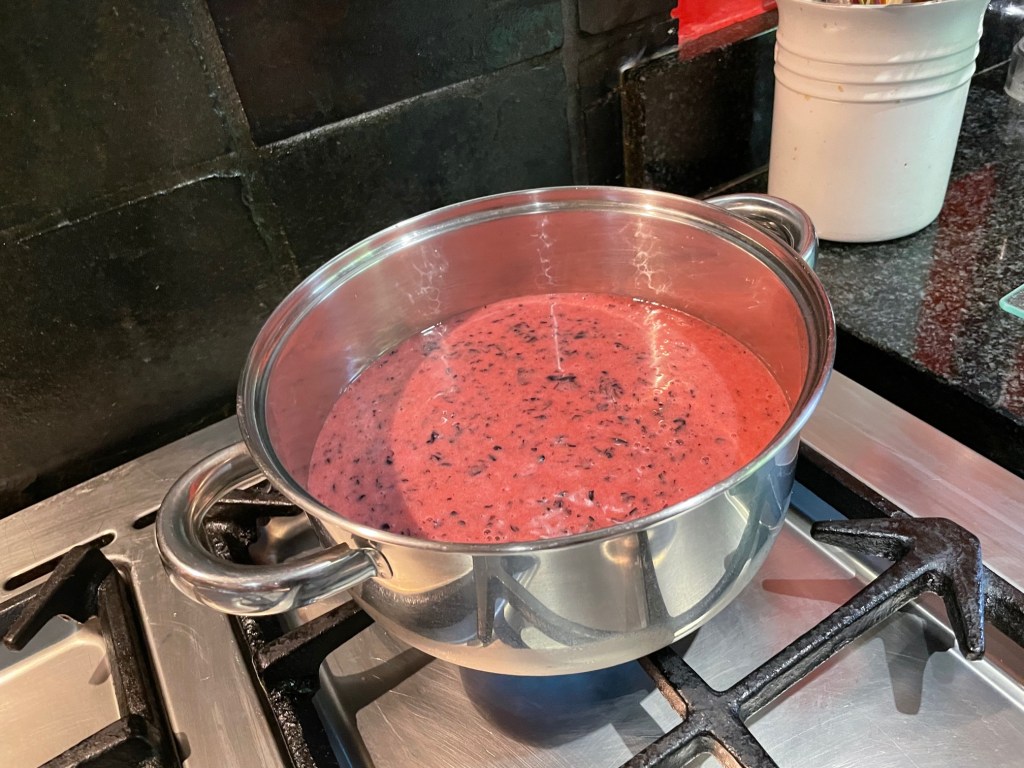
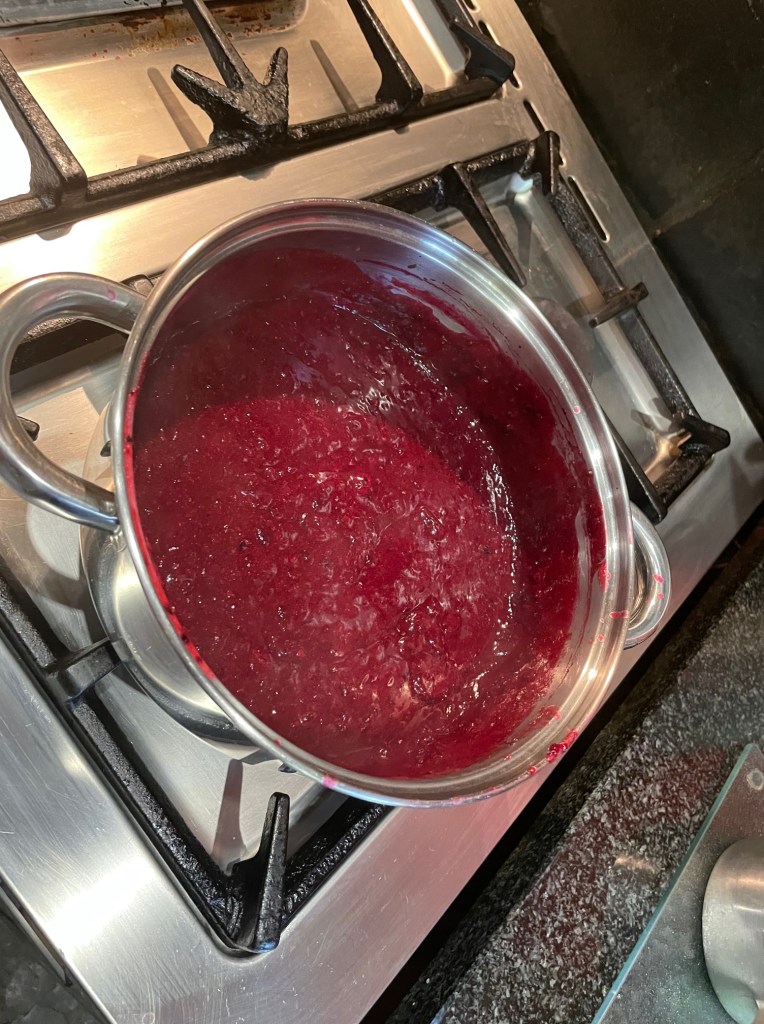
- Pour the mixture into a pot on the stove and place it on a medium heat, stirring occasionally until it starts to boil. Once the mixture starts bubbling, reduce the temperature to low and let it simmer until it’s reduced by about half. The colour of the mixture will get progressively darker as it simmers so don’t stress about that.
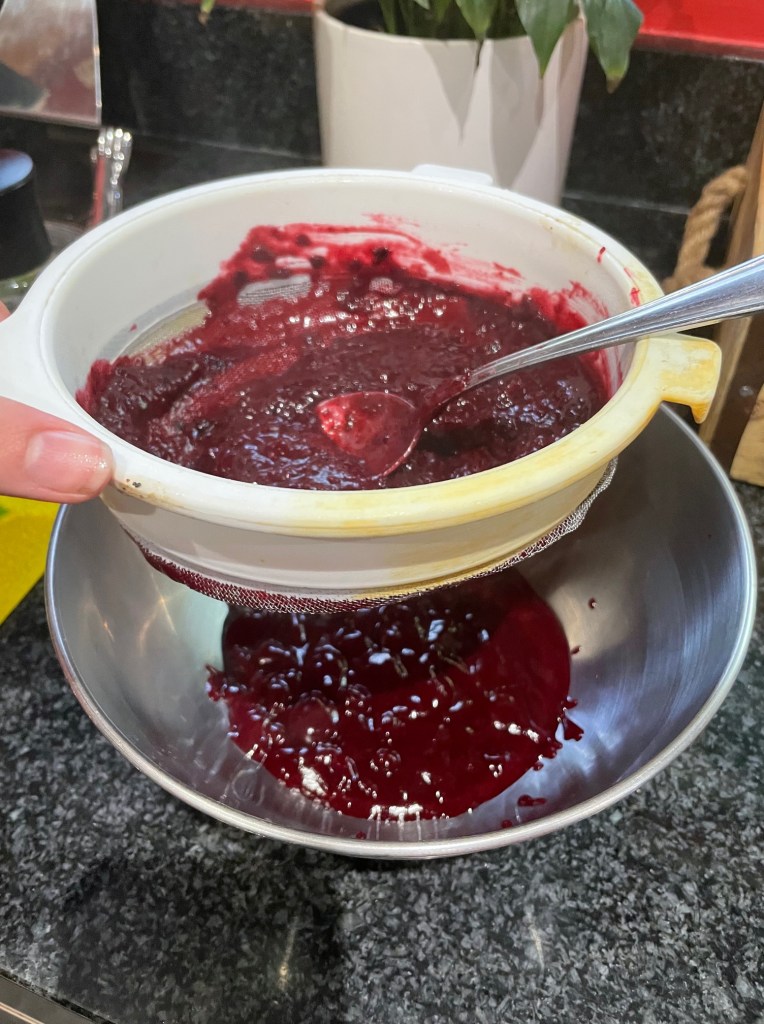
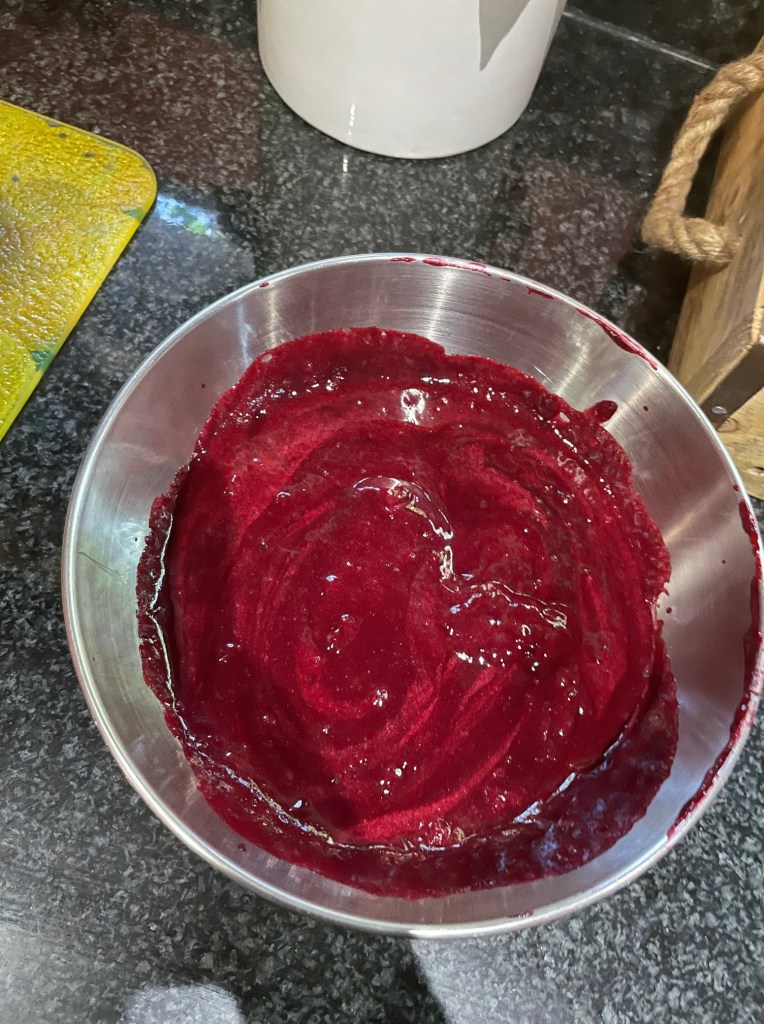
- Once the mixture has reduced, strain it into a bowl using a sieve and chill in the fridge
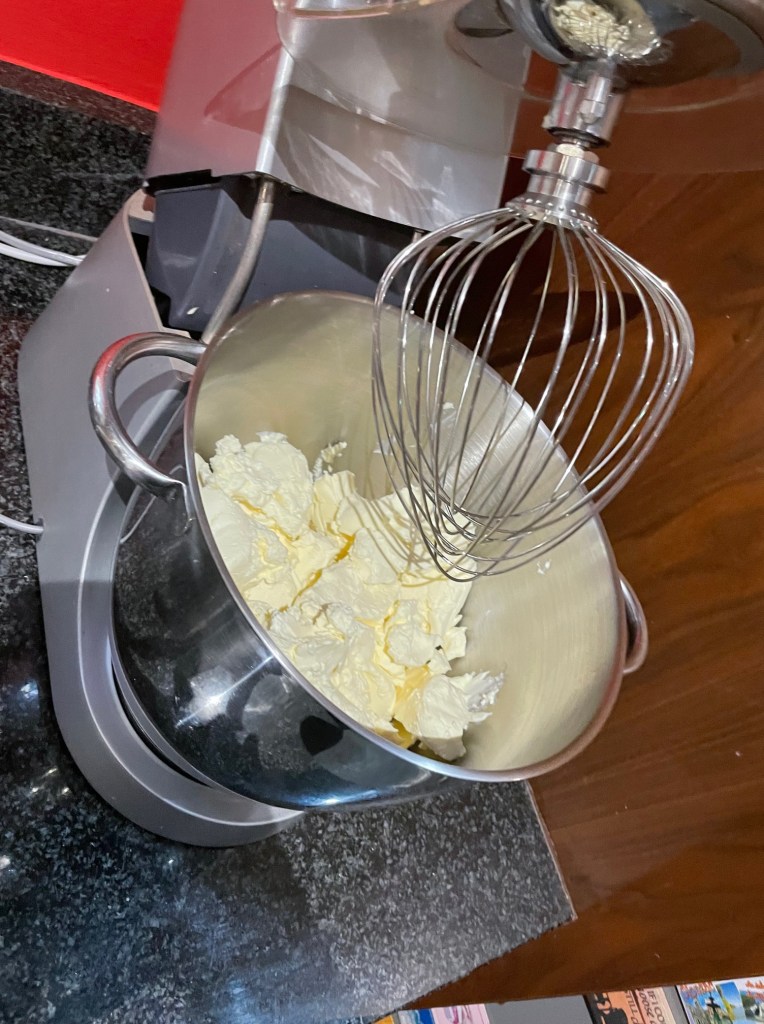
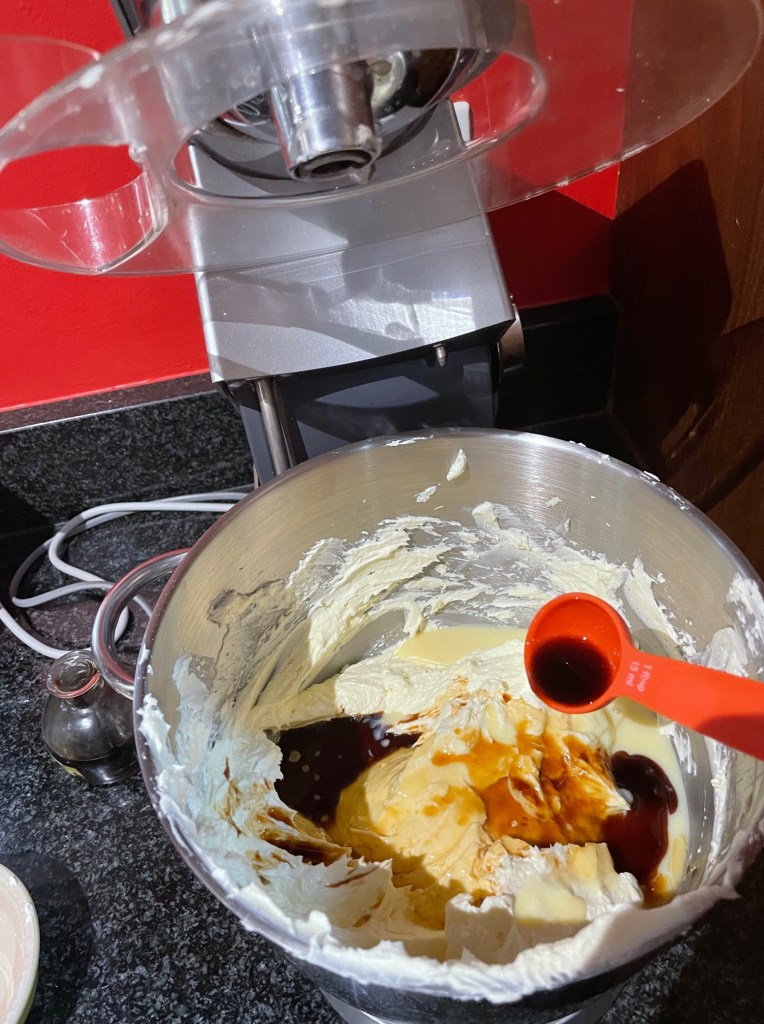
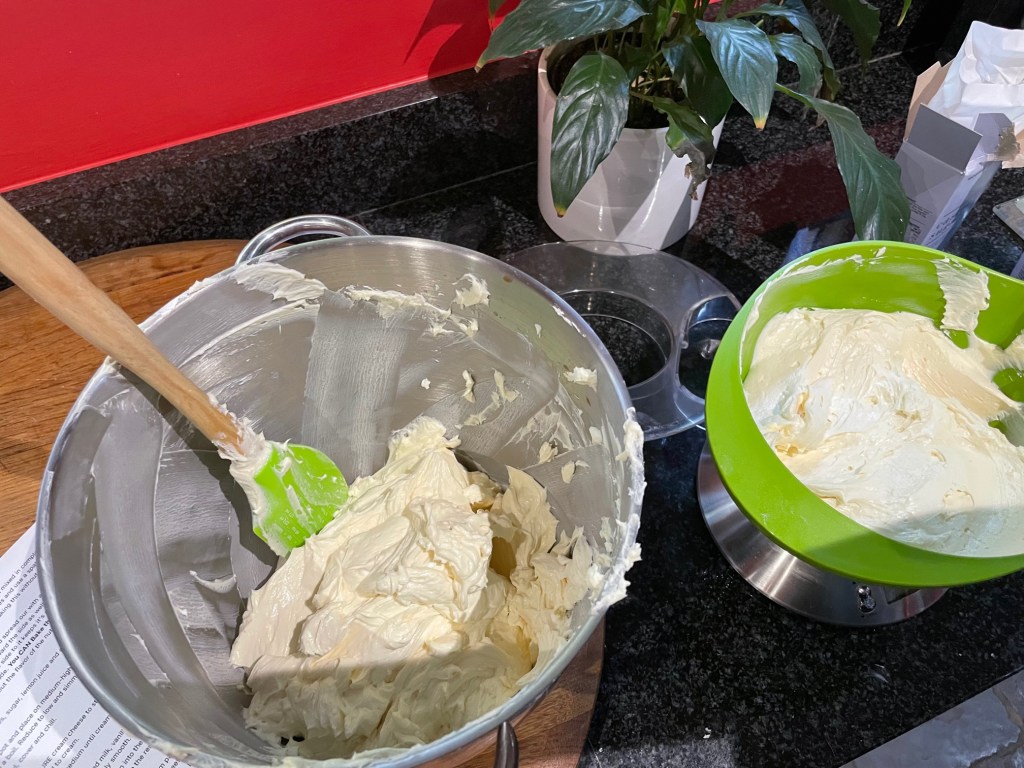
- Lastly, it’s time to make the filling: put the cream cheese into a kitchen stand mixer and mix at a medium speed to cream it (the cream cheese has to be at room temperature otherwise it won’t whip up nicely and your filling can end up quite dense)
- Add the sugar and keep mixing on a medium speed until it’s light and creamy. Use a spatula to scrape down the bowl and mix until the sugar is well blended in

- Pour the sweetened condensed milk, vanilla and lemon juice into the bowl and mix it in well. Scrape the bowl down again and mix with the spatula until it’s completely smooth
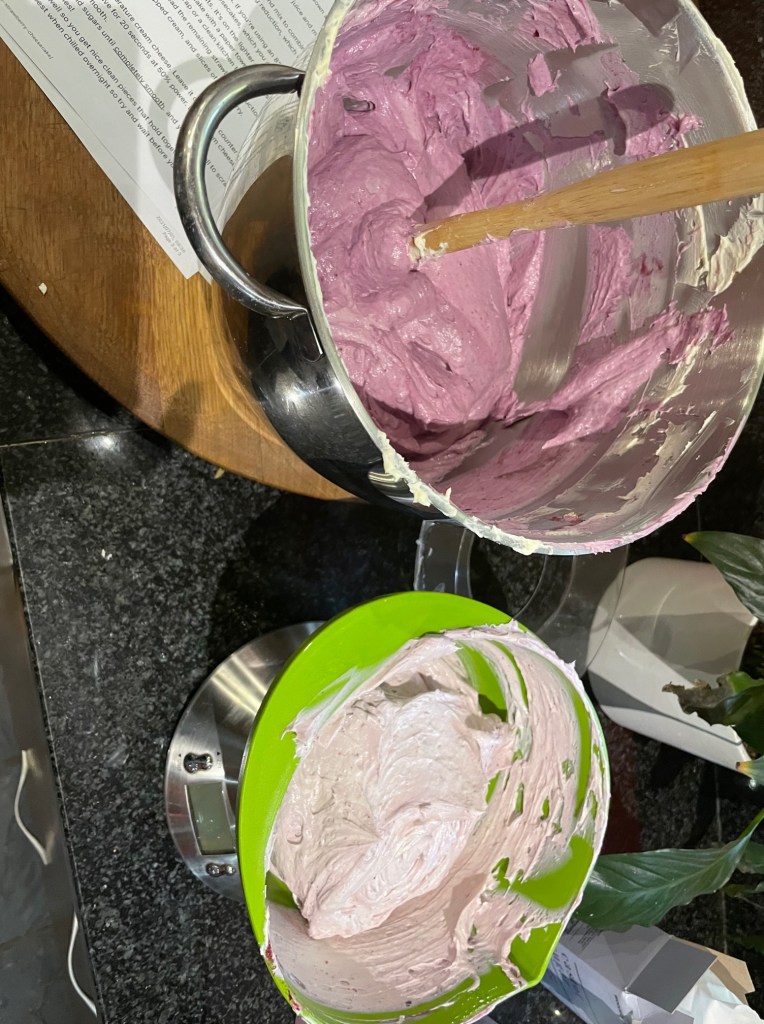
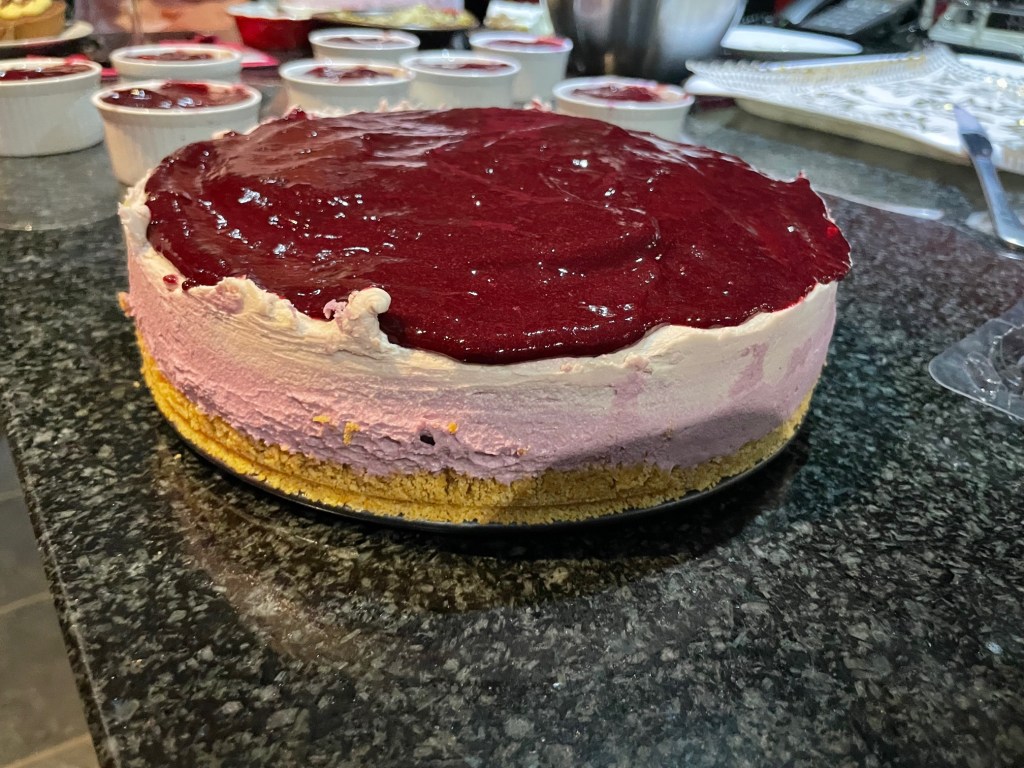
- Take the chilled reduction mix out of the fridge and add about a cup of it into the filling, then mix gently to combine. You can add a bit more to taste if you want. As you can see, I’ve split my filling mixture so I could do varying levels of colour/amount of blueberry reduction but you don’t have to do that if you don’t want to
- Place the remaining reduction in the fridge – don’t go eating it on your toast because we’ll be using it later on top of the cheesecake
- Take the crust out of the freezer, and pour in the filling and use a spatula to smooth over the top. If you’re splitting the filling to do different layers, chill the bottom layer for 10 minutes in the freezer, then add the second one and refrigerate but if not, then you can just plop it all in and place your cheesecake in the fridge
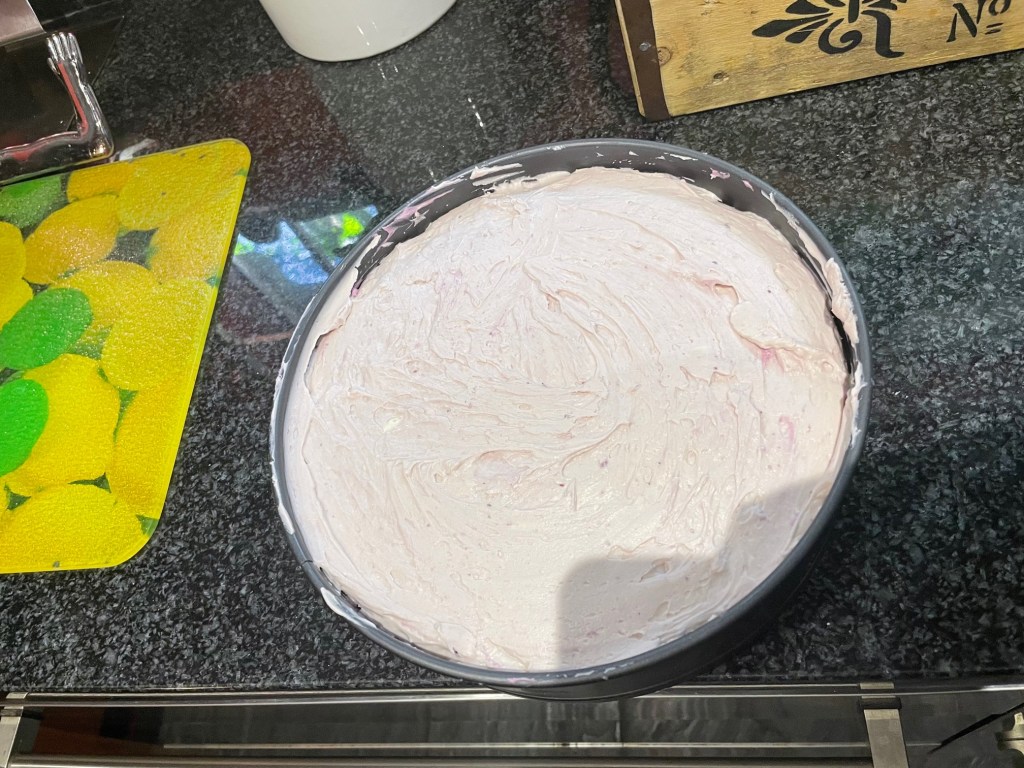
- The cheesecake will set better the longer it is in the fridge, so leaving it in overnight will give you a nice, firm cheesecake but it only needs to be in the fridge for about 5 and a half hours to set nicely if you’re in more of a rush
- Once the cheesecake has finished chilling, spread the remaining reduction over the top
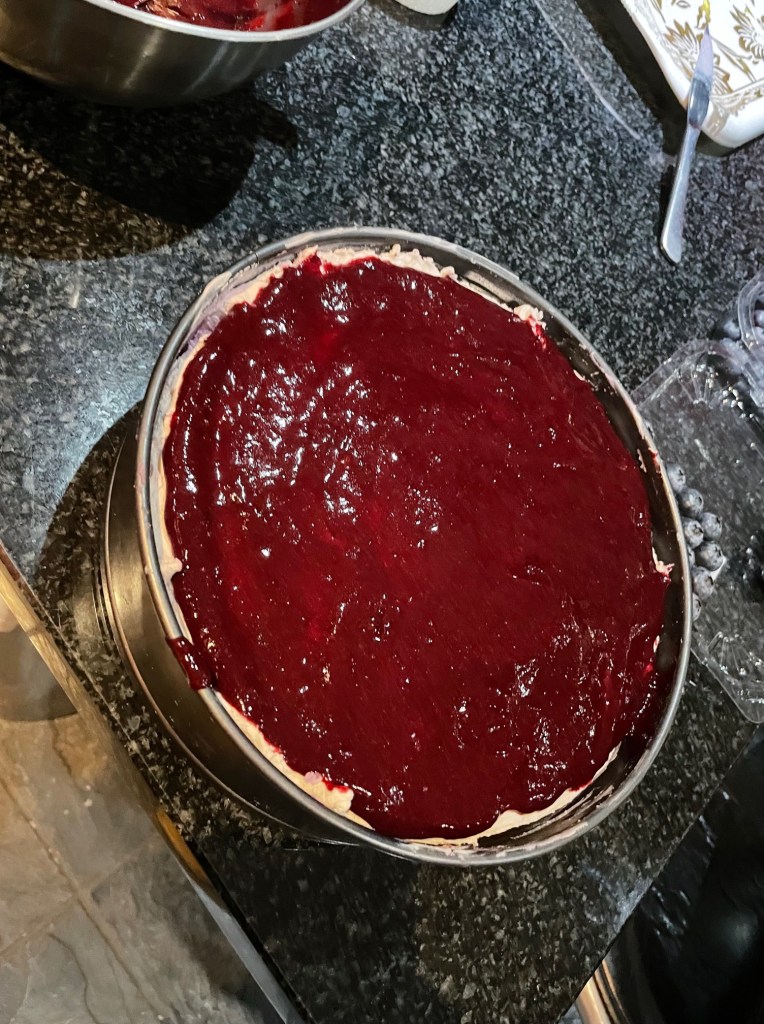
- If you’re using a spring-form pan, before you add the reduction, run a knife around the edges. Spread the reduction out, then remove the sides of the pan. This is the nerve-wrecking part where you truly know if the cheesecake has set because if it has, you’ll feel super satisfied and successful but if it hasn’t it will just spurt all over your counter … nothing like a bit of tension to increase the blood pressure in the kitchen hey?
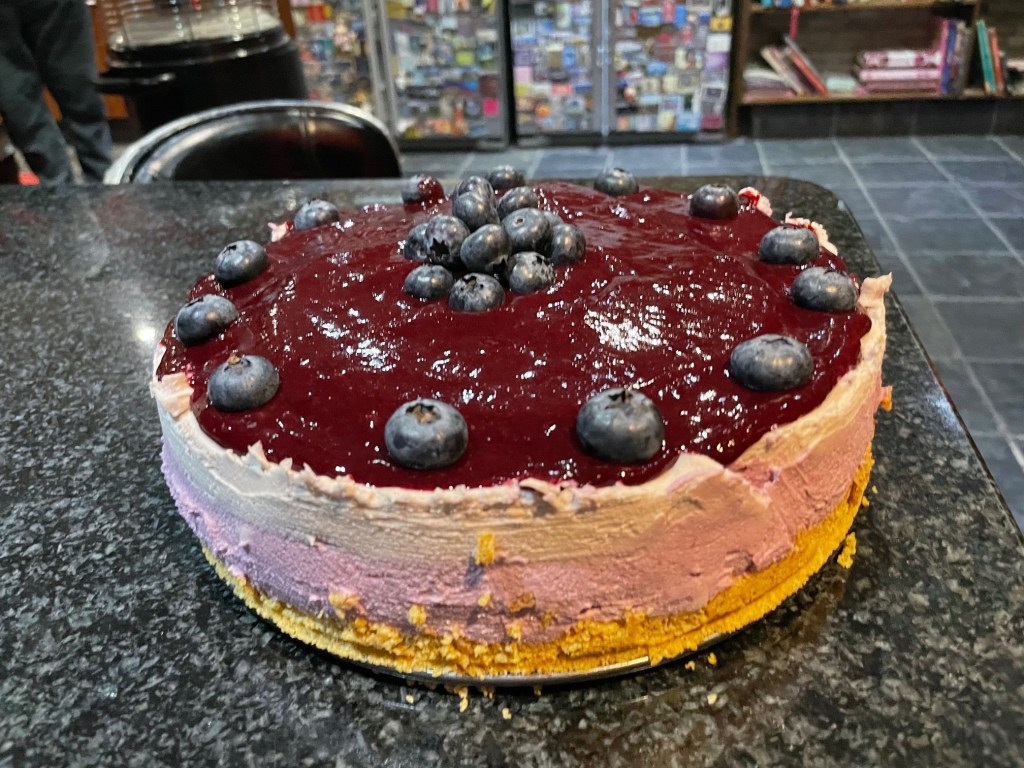
- Garnish the cake with blueberries, and if you’re feeling fancy some whipped cream and then slice and enjoy!!
And there you have it!! I had such fun figuring out this blueberry cheesecake and thankfully, it was well worth the effort because it was delicious!! Do you have a favourite cheesecake flavour? If so, what is it? Also, if you try out this recipe, please let me know how it turns out! Let’s chat in the comments section. Otherwise, that’s all I have for you guys today – I’ll see you on Saturday!
Lots of Love
Blondey on a Mission xxx

I love different flavours of cheesecake! I did try a blueberry cheesecake once and it was delish!
LikeLiked by 3 people
Oooh yayy I’m so glad it was delish! Cheesecake is awesome I’m thinking of making a nutella one next what do you think?
LikeLike
That’s worth a try!
LikeLiked by 1 person
I’ll let you know how it goes!
LikeLiked by 1 person
Cool!
LikeLiked by 1 person
THAT LOOKS SO YUMMY!!!!! and I’m sorry about the job 😦
LikeLiked by 2 people
Thanks it was pretty good!!! It’s okay thanks though – I’m hoping something else comes up 🙈☺️
LikeLiked by 1 person
It’s so beautiful! Blueberry is one of my favorite flavors so I’ll give this a try next time I want to bake something 😊
LikeLiked by 2 people
Awww thank you!!! Let me know when you try it and tell me how it goes – I hope it comes out delicious 😊😊
LikeLiked by 1 person
I’m sure it will 😁
LikeLiked by 1 person
This looks so so good. I am going to try this out! I usually do bake cheesecakes but they are so tricky to get exactly right. Will try this out next! ❤
Hope you get another summer job soon! It has been a lil tricky with the COVID situation and I totally understand how you feel. Loads of love! ❤
LikeLiked by 2 people
Thank you!! Yess you should definitely try it out and let me know how it goes❤️ ahhh yess I get that baked cheesecakes can be tricky. Aww thanks again yeah it’s very frustrating but thanks I hope another one comes up too ❤️❤️ hope you’re keeping well and lots of love!! ❤️✨
LikeLike
Hi Blondey, your Blueberry cheesecake was delicious, very rich , so the monster slice I was lucky to be given, I spilt over two helpings, thank you. Sorry other bloggers who are not close enough to get samples of Tia’s amazing baking and cooking.
LikeLiked by 2 people
Hi Wendy! Yayy so glad you liked it yeah I know it was quite rich haha so small portions :))
LikeLike
Looks so so yum🍓😀
LikeLiked by 2 people
awww thanks so much 😁✨
LikeLiked by 1 person
Wowza this looks delicious!! 🤤 I can’t have cheese but hopefully I’m not wrong in thinking that Philadelphia do a non-dairy version 🤔, either way there’s got to be an alternative out there (maybe soya yoghurt but I’d not know if it would solidify). This recipe doesn’t look like it’s one to be missed! 😋 Great post 💕
LikeLiked by 2 people
Why thank you 🙈😊 awww no. Hmmm I think there must be a dairy free version of cream cheese somewhere? If you find one and try it out I hope it turns out delicious and thanks so much for reading 💗😁
LikeLiked by 1 person
It looks amazing 😍
LikeLiked by 2 people
Thank you it was delish😊 would highly recommend trying the recipe
LikeLike
This looks very very appetising! 😍🤩🤩
LikeLiked by 1 person
Aww thanks so much!! 😊 if you prefer strawberry to blueberry you can swap the blueberries for strawberries and it will also taste good 😁✨
LikeLiked by 1 person
I’m very sorry about your job. Hope you find a more amazing offer!
LikeLiked by 1 person
Thank you I really appreciate that! I hope so too but if not I’ll just try make the most of the holiday time
LikeLiked by 1 person